I find lighting and drainage are the biggest culprits behind most Dieffenbachia problems, especially when leaves start turning brown or yellow. Dieffenbachia can be pickier than they get credit for, so understanding their specific care requirements—can make a big difference in keeping them healthy They might be durable, but there’s a big difference between surviving and thriving.
I’ve grown all sorts of Dieffenbachia around my home, and while they’ll thrive in the right conditions, the trick is finding that perfect spot. Today, I want to go over the most common issues you might run into—and, more importantly, how to fix them—so you can enjoy a healthy, thriving plant.
If you’re looking for more detailed tips on Dieffenbachia care, including watering, lighting, and repotting, be sure to check out my full Dieffenbachia care guide.

Why is My Dieffenbachia Dying?
Dieffenbachia issues usually come down to three main things:
- Lighting problems – Too much direct sun can scorch the leaves, while too little can lead to weak growth and overwatering problems.
- Poor drainage – Soggy soil leads to root rot, one of the quickest ways to kill a Dieffenbachia.
- Inconsistent watering – Both overwatering and underwatering can cause wilting, yellowing, or browning leaves. (More on that in the sections below.)
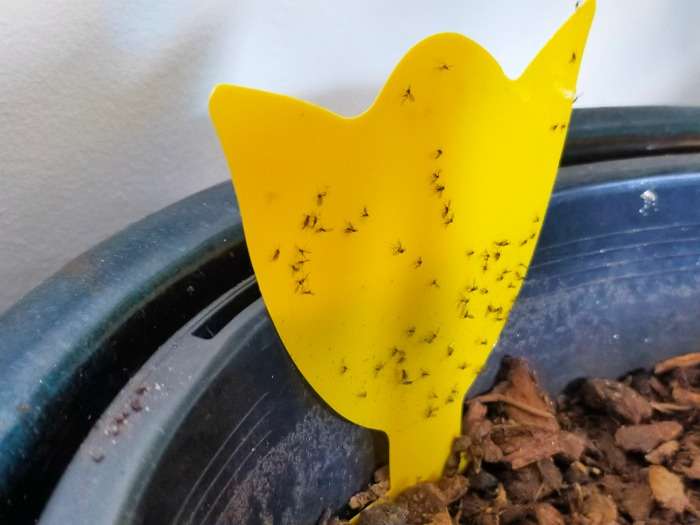
Tip: Clear pots can make it easier to check your plant’s roots for rot and moisture levels, so you can stay on top of things before any problems get too bad.
Why Are My Dieffenbachia Leaves Turning Brown?
If your Dieffenbachia has brown leaves, it’s most likely due to overwatering. Overwatering is usually the biggest issue for most indoor plants, in my experience. While underwatering can also cause Dieffenbachia brown leaves, it’s less likely.
How to Tell If It’s Overwatering or Underwatering?
To figure out the cause, start by touching the leaves. Crunchy leaves usually mean the plant is underwatered, while soft, mushy leaves suggest overwatering.
Location matters too—if your Dieffenbachia is in a bright spot, brown leaves are more likely from underwatering or even sunburn. In a darker spot, overwatering is the more likely cause.
Tip: A spot that looks bright to you might still be too shady for a plant. Generally, 3 meters (10 feet) or more from a window is considered low light, even if the room seems bright.
Sunburn vs. Underwatering
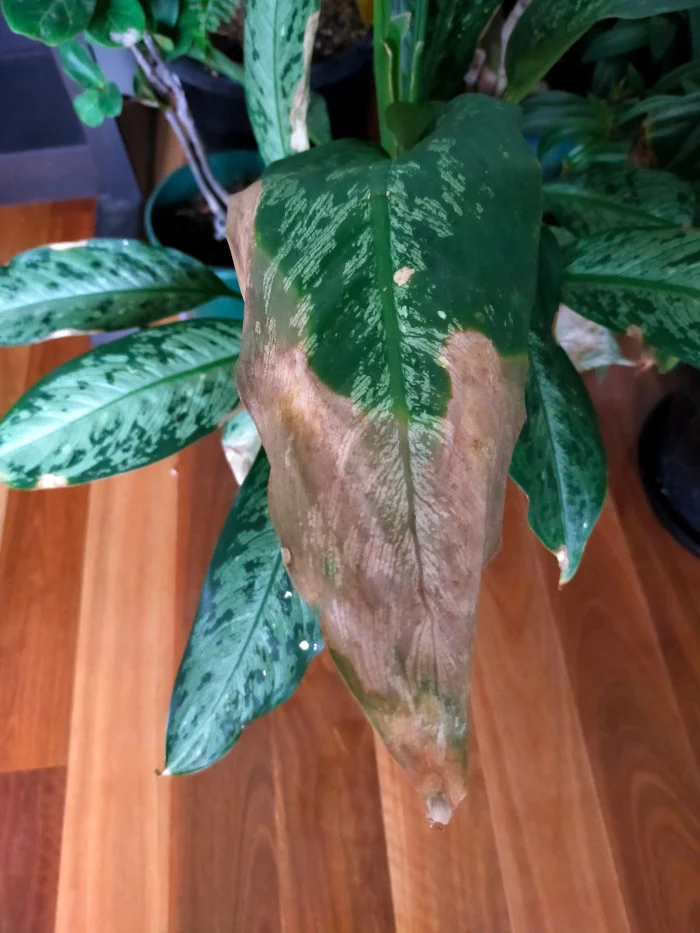
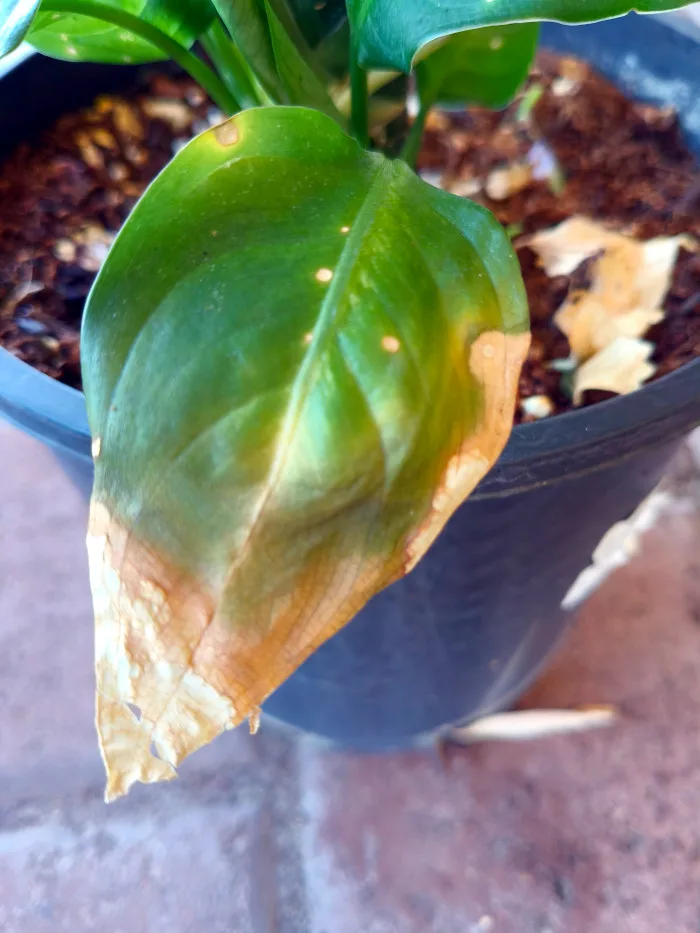
Brown, sunburned leaves look different from those caused by underwatering. Sunburn shows up as brown spots or patches anywhere on the leaf, even in the middle, and it happens fast—often within a day of too much sun.
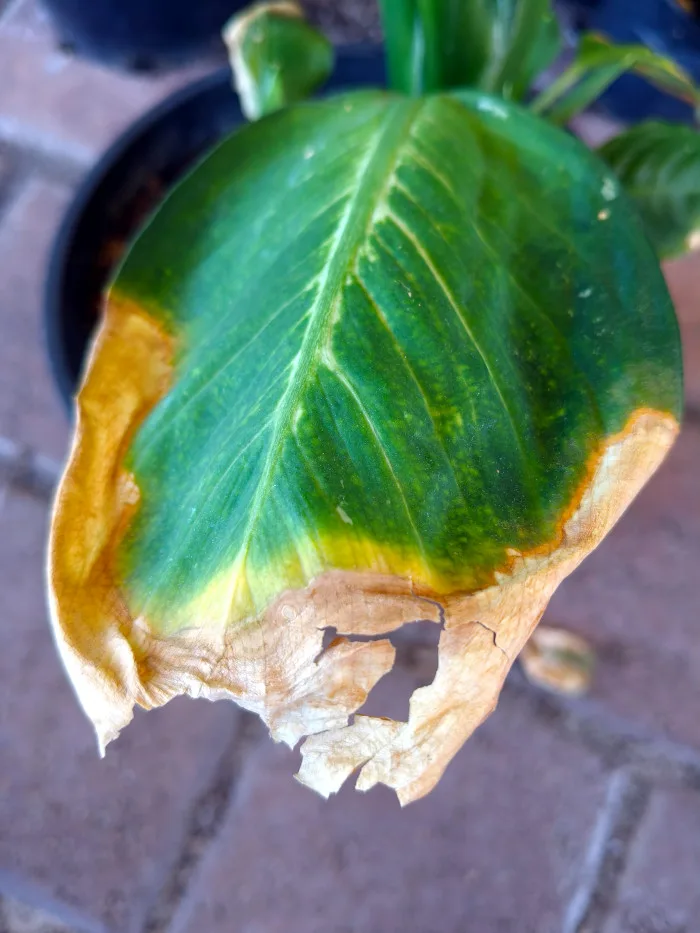
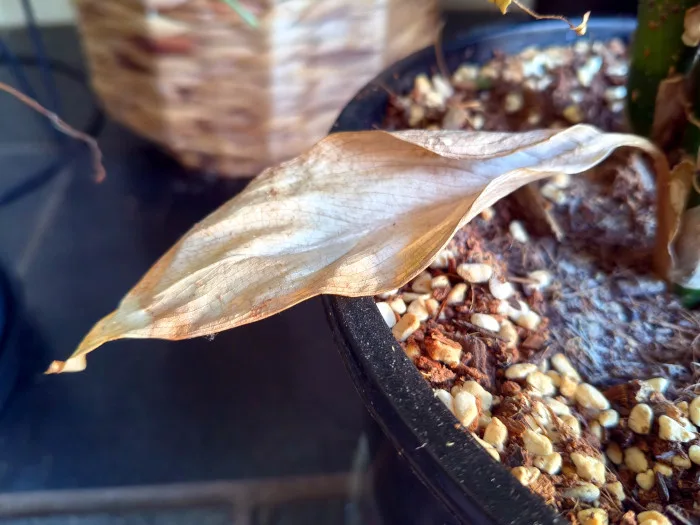
Underwatering, on the other hand, starts at the edges and tips, with browning creeping inward as the leaf slowly dries out and dies.
Dieffenbachia Brown Leaves: Quick Things to Check
- Overwatering: Soggy leaves, moist soil, and a shady location often point to overwatering. The plant’s roots can’t absorb water properly, leading to root rot and brown leaves.
- Underwatering: If the leaves are crunchy, the soil is dry, and the plant is in a bright location, it’s likely the result of underwatering. The leaves will start to brown at the tips and edges as the plant struggles to get enough moisture.
Dieffenbachia Leaves Turning Yellow
If you’re wondering why your Dieffenbachia leaves are turning yellow, you’re not alone. This is one of the most common issues people face, and there are several possible causes. I like to work through a process of elimination—starting with the easiest problems to identify before considering the more complex ones.
Nitrogen Deficiency
One of the easiest causes to spot is a nitrogen deficiency. This often happens when potting soil becomes depleted or when liquid fertilizer isn’t applied consistently. The key sign? Completely yellow leaves, including the veins.
Other things to look out for:
- Stunted growth
- New leaves are pale or yellow
Old Foliage
Another simple explanation is that the plant is just shedding old leaves. Dieffenbachia naturally drops older foliage to redirect nutrients to new growth. If the yellowing is happening only on the lower leaves, and the top foliage (especially new growth) looks healthy, this is probably just part of the plant’s normal cycle.
Watering Issues
Similar to when Dieffenbachia get brown leaves, the leaves can turn yellow due to inconsistent watering. Both overwatering and underwatering stress the plant and often lead to yellowing.
To break it down, check the top and bottom of the plant. Yellowing that starts at the edges or tips of older leaves usually points to inconsistent watering. It could be from a short period of neglect causing yellow/brown tips, or from overwatering.
Overwatering usually causes more noticeable decay and yellowing on the tips and edges. In my experience, underwatering affects the tips first, not the edges, and tends to be smaller and less noticeable at first.
If there are small, new leaves at the bottom of the plant that are yellow or dying, this is usually a sign of underwatering.
Dieffenbachia Yellow Leaves: Quick Things to Check
- Nitrogen Deficiency: Yellow leaves, especially with yellowing veins, and stunted growth can be signs. Check if the new leaves are yellow to confirm.
- Old Foliage: Yellowing at the bottom with healthy top growth is likely part of the plant’s natural cycle.
- Overwatering: If the leaves are soggy, the soil is moist, and the plant is in a shady spot, it’s probably overwatering. Look for yellowing at the tips and edges of older leaves, along with noticeable decay.
- Underwatering: If the leaves are crunchy, the soil is dry, and the plant is in a bright location, it’s likely underwatering. The leaves will brown at the tips and edges as the plant struggles for moisture.
Tip: If you’re having trouble with watering, I find that a well-draining soil really makes things simple, helping prevent overwatering most of the time.
Dieffenbachia Wilting
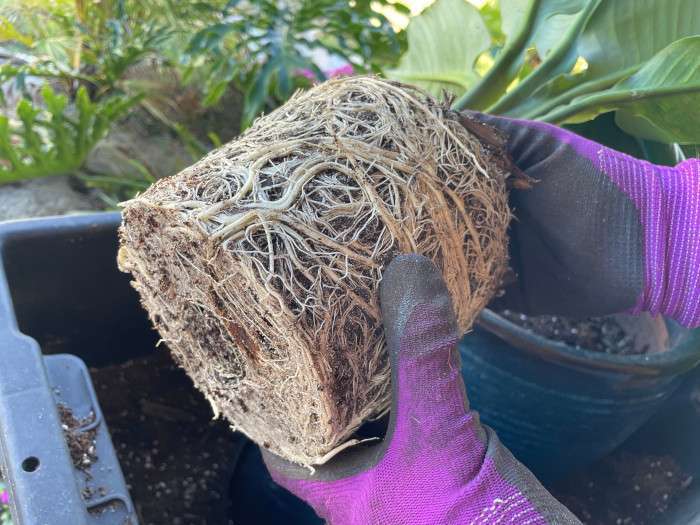
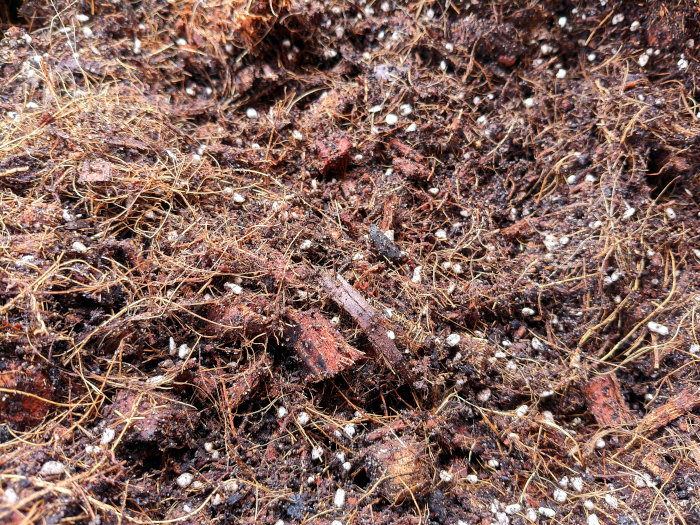
Wilting usually means the plant needs water. If the soil is already wet and the plant is still wilting, it may be suffering from root rot. Inspect the roots and trim away any black or mushy parts. This can help the plant recover if caught early.
Solving Dieffenbachia Issues
In general, plant problems are often caused by a combination of factors rather than a single issue. A holistic approach—repotting with fresh, nutrient-rich soil, adjusting your watering routine, improving lighting, and closely monitoring your plant—can help bring it back to health.
- Lighting: Make sure your Dieffenbachia gets bright, indirect light. This promotes healthy growth and helps the plant use water more effectively. Too little light can slow growth and increase the risk of overwatering.
- Underwatering: If the soil is dry, increase the frequency of watering. The goal is for the potting mix to retain some moisture without becoming too soggy.
- Overwatering: Cut back on watering and ensure the soil drains well to prevent excess moisture from causing root rot.
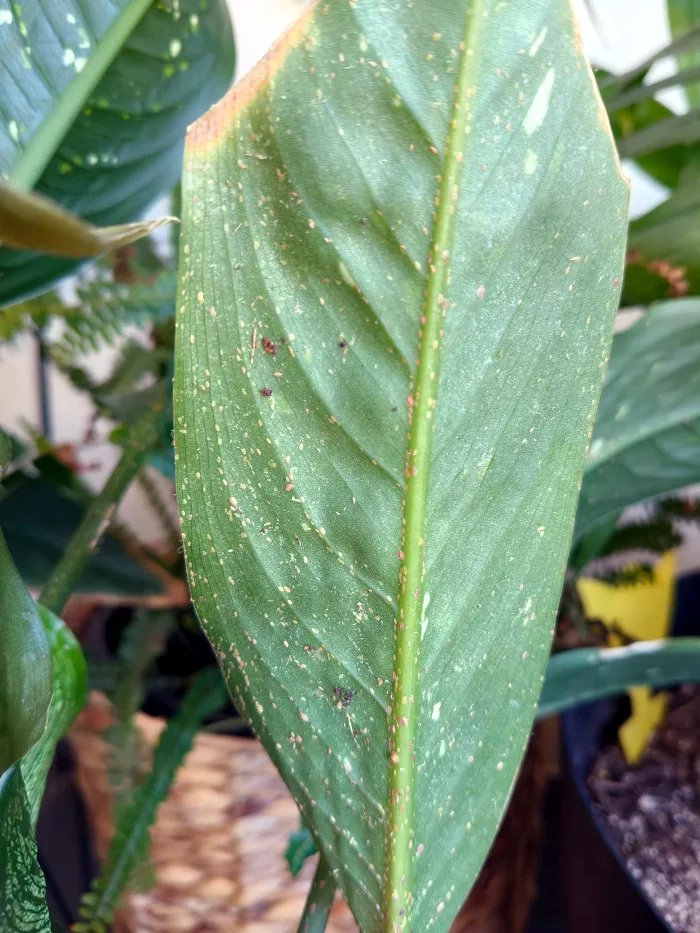
Common Dieffenbachia Pests
If you notice sticky residue on your Dieffenbachia’s leaves, this is often a sign of sap-sucking insects like scale, mealybugs, or thrips. These pests feed on the plant’s juices, leaving behind honeydew—a sticky, sugary substance that can sometimes lead to sooty mould.
Check your plant closely for these common culprits:
- Scale Insects: These attach to leaves and stems, appearing as small, round, brown, or black bumps.
- Spider Mites: Look for tiny red spiders or fine webs on your plant.
- Mealybugs: Small, white, cotton-like masses that usually hide in crevices.
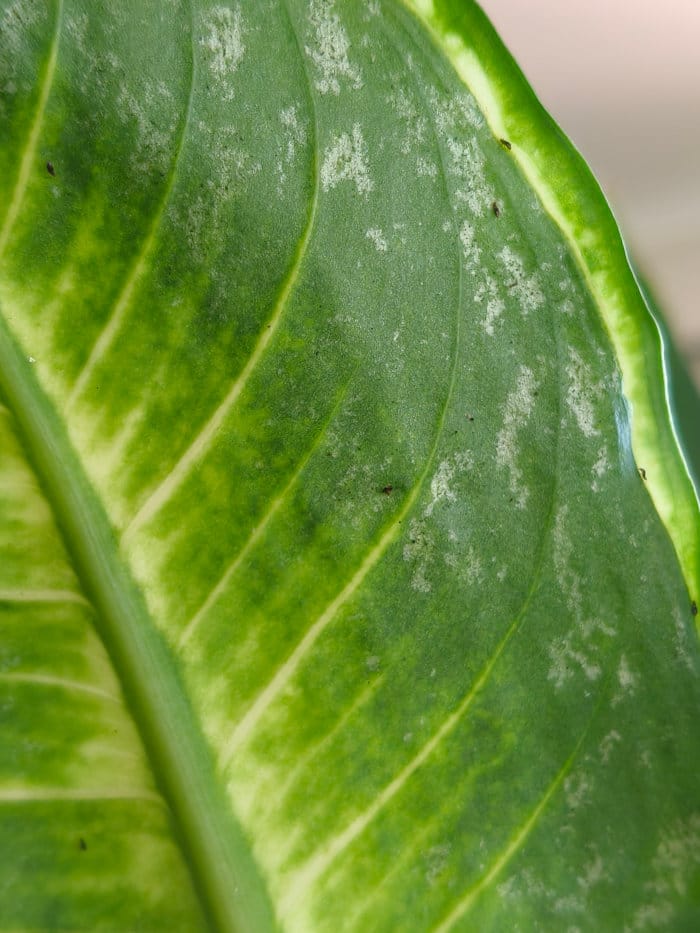
- Thrips: Look for silvery damage on the leaves—thrips usually hide underneath, appearing as small, slender-bodied insects
How to Deal with Dieffenbachia Pests
- Take the Plant Outside: Begin by moving the plant outdoors. This will stop the pests from spreading to other plants in your home.
- Rinse with a Hose: Use a hose to rinse the plant. This works well to wash a lot of insects off the plant. Often once removed they can’t work out how to get on again.
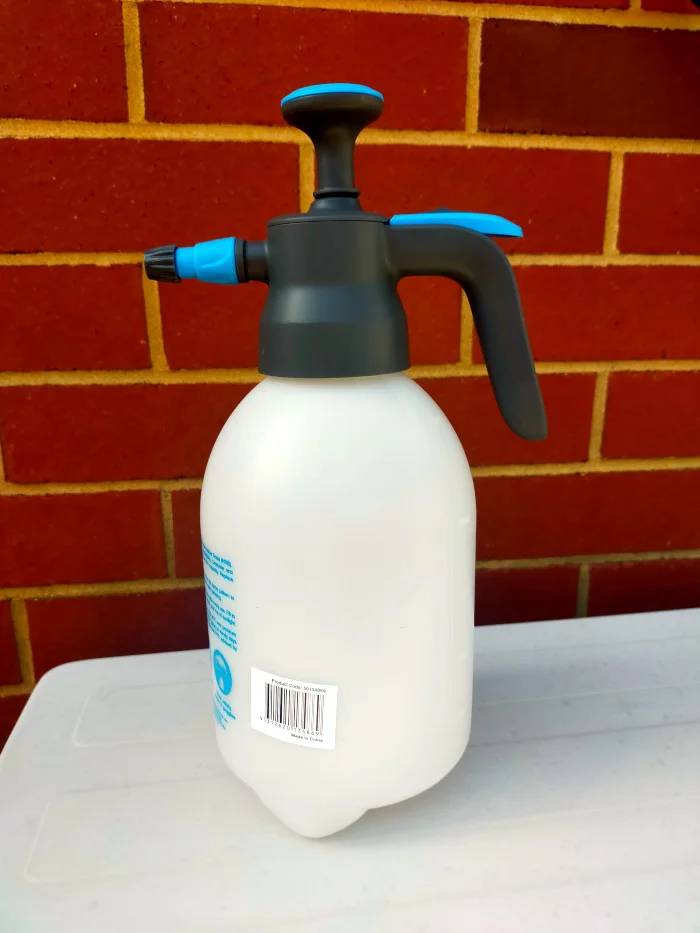
- Apply Insecticidal Soap or Oil: After rinsing the plant, apply an insecticidal soap, neem oil, or horticultural oil. These treatments are usually applied as a spray, which you can mix according to the product’s instructions. Once you’ve treated the plant, you might notice that pests like scale insects turn brown—this means that they are dead.
- Repeat as Necessary: Regularly monitor the plant for signs of a recurring infestation. Reapply the insecticidal soap or oil as needed, typically once a week for about two weeks, until the pests are fully eradicated.
If you prefer a DIY approach, you can make your own insecticidal soap using water and dishwashing liquid.
Another simple yet effective way to care for your plants is by regularly wiping the leaves. Doing this about once a week not only helps keep them looking clean and vibrant, but it also reduces dust build-up.
Dust can block sunlight and hinder photosynthesis, slowing down your plant’s growth. Plus, wiping the leaves gives you a chance to spot any pests early before they turn into a full-blown infestation.
Conclusion
Keeping your Dieffenbachia healthy comes down to getting the basics right—good lighting, well-draining soil, and a steady watering routine. Most problems can be prevented with a little attention, and catching issues early makes a big difference.
Pests are easier to deal with before they spread, and things like yellowing or browning leaves are often fixable once you pinpoint the cause. With the right care, your Dieffenbachia will not just survive but thrive.