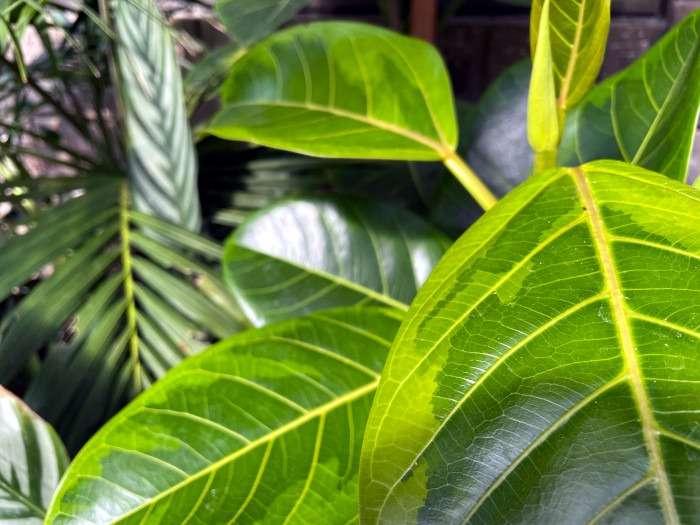
With their large leaves and striking height, rubber trees make an excellent thriller piece in any home. It looks so good in fact, you want more. We’ve all been there, fear not friend, I’ve propagated and grown a lot of rubber plants to pretty decent sizes.
Join me in this step-by-step guide to learn the two methods I’ve had great success with—and start growing more rubber plants today.

Materials Needed
- Knife/Pruner – Whenever cutting plants, using blades sterilized with alcohol is good practice to avoid spreading disease.
- Vase (Water Propagation) – A see-through vase is ideal so you can monitor the roots for disease and growth.
- Rooting Hormone (optional) – The base of the stem can be dipped in rooting hormone to increase the chances of roots growing but either method will work without it.
How to Propagate a Rubber Plant in Water: Step-by-Step
If you want to know how to propagate a rubber plant from a cutting, doing it in water is probably the easiest, no fuss method. You won’t need to worry about keeping the soil moist and it will allow you monitor the development of the roots.
1. Take a Cutting
Before you take a cutting, make sure the mother plant doesn’t have any diseases and looks healthy. Take a healthy cutting about 15-20cm (6-8in) long from the main plant, don’t worry about nodes.
You want a few leaves on it, but not too many. Since the cutting won’t have roots, it will be hard to support too much growth.
Note: You can take much larger cuttings—even whole branches—and propagate them, but it’s more likely to fail and you’ll need to keep them moist at all times.

2. Prepare the Cutting
Remove some leaves from the base of the cutting so you have a bare area to place in water. Take your cutting and let it sit for around 10 minutes while the cut wound scabs over and dries. This will help prevent the stem from rotting.
At this point you can dip the bottom of the cutting in rooting hormone if you wish.
3. Place Rubber Plant Cutting in Water
Place the cutting so the stem is in the water and place in a bright location but keep out of direct sunlight.
Note: Plant roots need oxygen, so the water should be changed occasionally to reintroduce oxygen and prevent bacteria that may cause rot. Don’t worry too much—just change it whenever you remember.
4. Monitor the Progress
You should see roots developing in about 4–6 weeks, but it may take longer. Just stick to your routine and be patient.


Tip: Keep changing the water every so often to reintroduce oxygen for the roots. Don’t worry too much—just change it whenever you remember. If you see rot, chop it off and put the cutting back in.
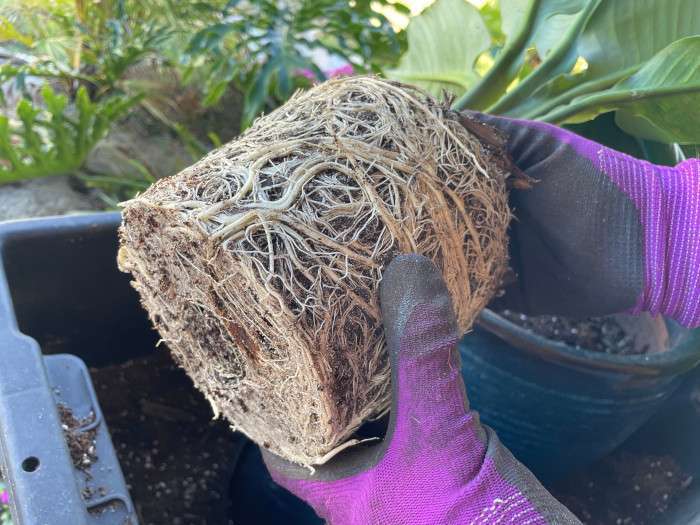
5. Transplant Your New Propagations
Once the roots have started to fill the vase and are growing their own secondary roots then its ready to be transplanted. You transplant the same way you would normally repot a plant.
- Water thoroughly to help the roots settle into the soil.
- Keep the plant in bright, indirect light to encourage strong growth.
I find rubber tree transplants quite hardy so you shouldn’t have much trouble.
Tip: Make sure the pot is the right size for the roots, don’t start off in a pot that is too large for the roots, as this can lead to waterlogged soil and root rot.


How to Propagate a Rubber Plant in Soil
Rubber plants are incredible hardy and can propagate well in soil with minimal care. If the weather is cool and wet, you can have success just planting straight into your garden and forgetting about it.

1. Select and Prepare Your Cutting
Choose a healthy stem from the mother plant, making sure it’s free from disease or damage. The cutting should be about 15–20 cm (6–8 in) long.
Remove a few of the lower leaves to expose some bare stem, which will go into the soil. If the cutting has large leaves, you can trim them down slightly to reduce moisture loss.
Let the cutting sit for around 10 minutes to allow the wound to dry and form a callus. This helps prevent rot when planted in soil.
Tip: You can dip the base of the cutting in rooting hormone at this stage, but it’s not essential.
2. Plant the Cutting in Soil
When learning how to propagate a rubber plant in soil, it’s important to choose the right type of soil for successful rooting. For the best chance of success, plant the cutting in loamy, water-retentive soil to prevent it from drying out.
If you’re in a very hot climate, it’s a good idea to keep the cutting out of direct sunlight. Some people like to place some plastic barrier around the cutting to trap moisture such as a plastic bottle, I’ve had success without doing so.
3. Caring for Your Propagation
Keep the soil moist while the cutting takes root. You can tell it has taken root by giving the stem a gentle tug after 6 weeks or so, It should hold in place. If the stem comes out easily then push it back in and give it more time.


Conclusion
There’s never a 100% success rate with propagation, but by following the steps in this guide, you’ll give yourself the best chance possible. With a lot of patience and a little effort, you’ll soon be rewarded with a healthy propagation well on its way to becoming a mature plant.