After keeping chickens for some time and dealing with the neighbour’s cats chasing them, I knew I needed a predator-proof chicken tunnel. It turned out to be easier and cheaper than I expected.
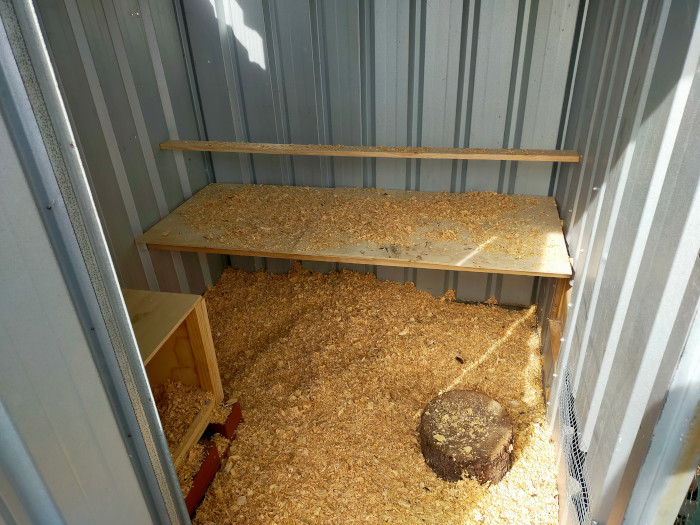
Since I’d already converted a shed into a chicken coop, I felt ready to build a DIY chicken tunnel. Today, I’ll share how I built it and what worked for me. Hopefully, along the way, you’ll get some ideas for your own chicken tunnel.
Materials
When planning my DIY chicken tunnel, I spent some time looking for ideas but a lot of them needed materials I didn’t want to buy, or were a little too complex for me to build.
Instead, I used a lot of old materials from previous chicken projects—chicken wire, zip ties, things like that. The most important thing you’ll need is a rigid wire mesh to maintain the shape of the tunnel. In the end, this project cost me around $80 to $100.
Here’s what I mainly used:
- Stakes
- Landscape Pegs
- Wire Mesh
- Chicken Wire
- Zip Ties
The Plan
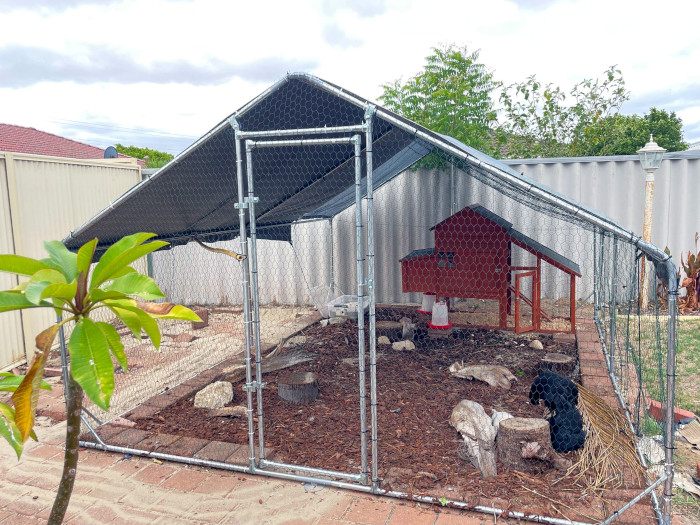
My plan was to have the chicken tunnel run along the back fence. This evolved (as they always do) into having a second chicken run area that the tunnel would lead to. Here I would be able to grow different plants and herbs that would give them shade and a place to find fresh forage in.
Better-quality forage leads to better-quality eggs, after all.
Building the Chicken Tunnel
At first I tried using some old wire we had lying around, bending it into shape to make the tunnel. I think it would’ve worked fine, but there were a couple of issues.
First, we didn’t have enough wire for a 10-meter tunnel. Second, some of the holes were larger than others, and I was worried smaller chickens could slip through.
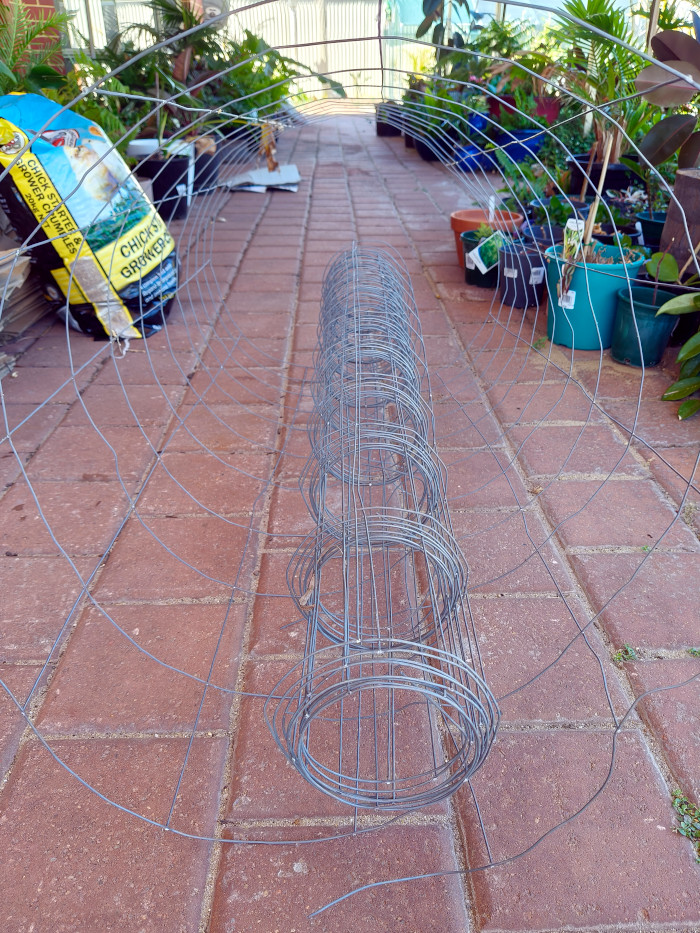
Length of the Roll
I thought about solving this by wrapping it in chicken wire. The thicker metal wire would still work as a frame, and I could just attach the chicken wire with zip ties.
In the end, I decided to buy a 10-meter (32 ft) roll of wire mesh, which made things a lot easier.

Size of Holes
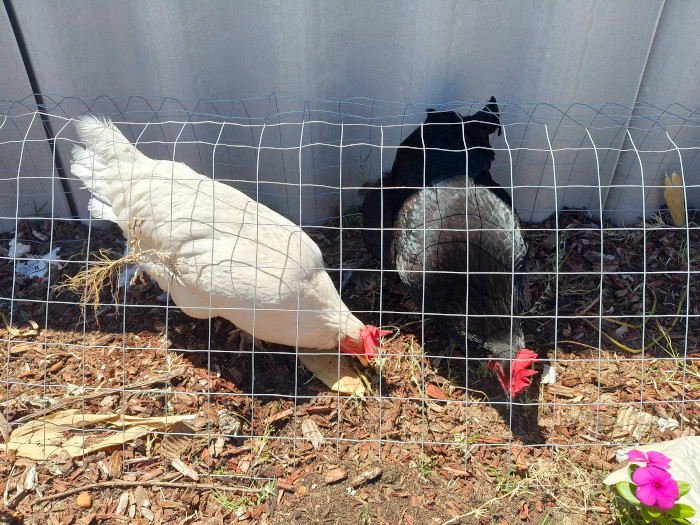
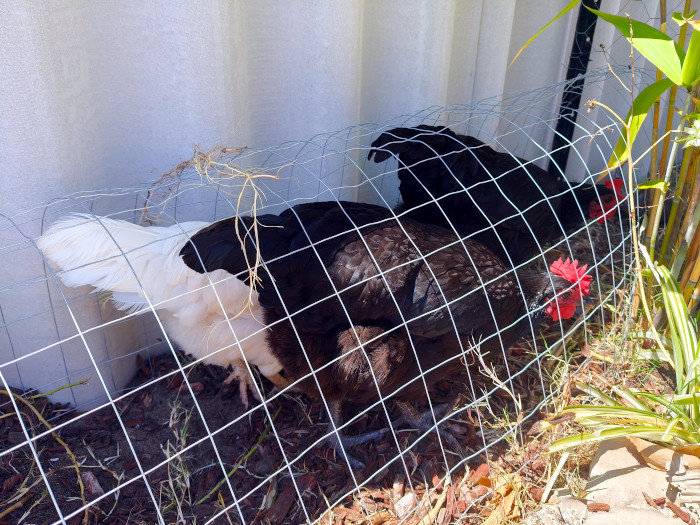
The wire mesh is crucial for building a predator-proof chicken tunnel. The mesh is tough and rigid, holding its shape really well. The holes are small enough to keep the chickens in and any predators out.
You can choose smaller holes if you want to keep your chickens heads in the tunnel, or larger ones if you don’t mind them sticking their heads out to forage.
My main concern was the neighbour’s cat and possibly birds of prey, this setup works fine for both.
Tip: Chickens can fit through pretty small spaces so make sure the holes are no larger than 4 cm (1.5 inches).
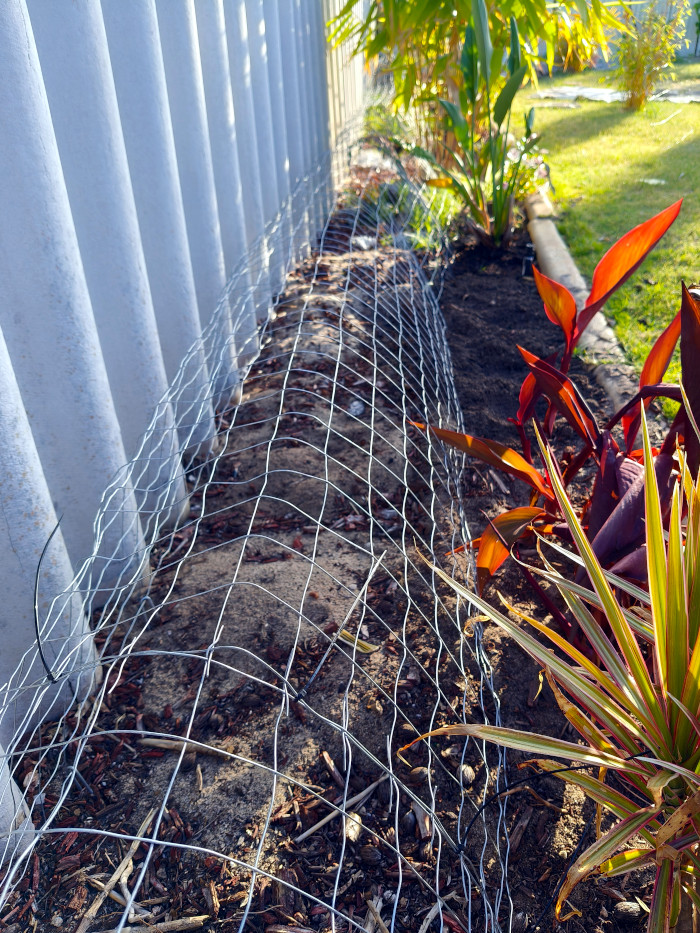
Anchoring the Tunnel to the Ground
There’s no bottom on the tunnel because I wanted the chickens to be able to scratch around. This does make it easier for predators to get in, so if you want a more predator-proof chicken tunnel, I’d enclose the whole thing—including the floor—in wire mesh.
The tunnel is anchored to the ground with landscape pegs spaced about half a meter apart (20 inches).
I found the pegs didn’t hold well in soft sand, so I used small rods and stakes driven into the ground, attaching them to the tunnel to them. If you’re attaching the tunnel to a lawn or harder soil, the pegs will work a lot better.
Another option could be to attach the tunnel to wooden runners. This would give the tunnel some extra height (which is always a bonus) and be able to slide around on the ground, making it a moveable chicken tunnel.
Wood staples would work really well for securing the metal to the wooden runners.
Tip: Chickens kept in one spot will quickly destroy the lawn or foliage, so moving them around is a good way to keep your lawn intact.
Chicken Tunnel Dimensions
The tunnel itself is about 40 cm wide and high (16 inches) so there is plenty of room for chickens to move around comfortably.
If you buy a roll that’s the right length, you can just unroll it and bend it into shape without needing to cut anything. This makes the whole process quick and easy.
I initially bent it into a triangle with my hands, then smoothed it out a bit to form more of a curve—just because I liked the way it looked better.
Connecting the Run to the Tunnel
I ran into a problem where I needed to bridge a small gap between the existing chicken run and the tunnel.
To solve this, I used some leftover poly pipe and bent it into semi-circles. The poly pipe was a bit flimsy, so I reinforced it by pushing thin metal spikes inside, which made it a little more rigid, but it still wasn’t great.
Tip: If you’re using poly pipe for hoops, choose thicker, more rigid ones to get better stability.

To reinforce it further, I drove some small plastic stakes into the ground and tied the poly pipe to them. Finally, I wrapped some leftover chicken wire around the hoops, completing the bridge.
Ideally, this section would have some sort of gate system. This would allow me to close it for a few months each year, giving the foliage a chance to grow back before releasing the chickens again. It could also be handy for keeping the chickens out when I need to do maintenance.
Maybe down the line, I’ll add a gate, but for now, it works just fine.

This section is definitely a weak point in the design. However, it should work against cats. If you’re aiming for a more predator-proof setup, I’d recommend using wire mesh along the entire length.
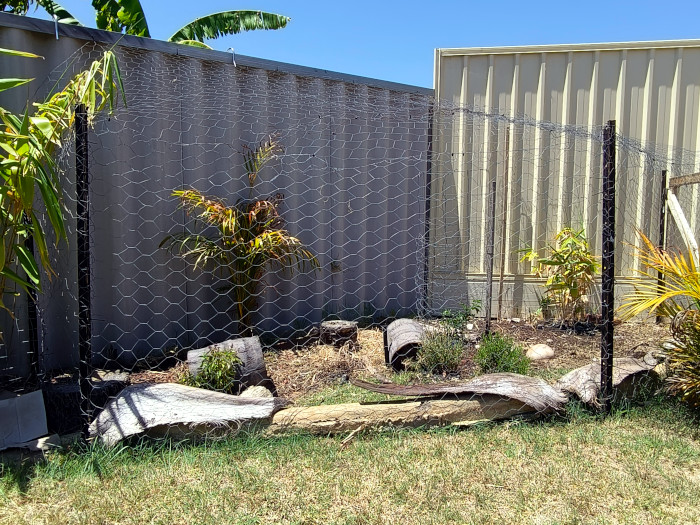
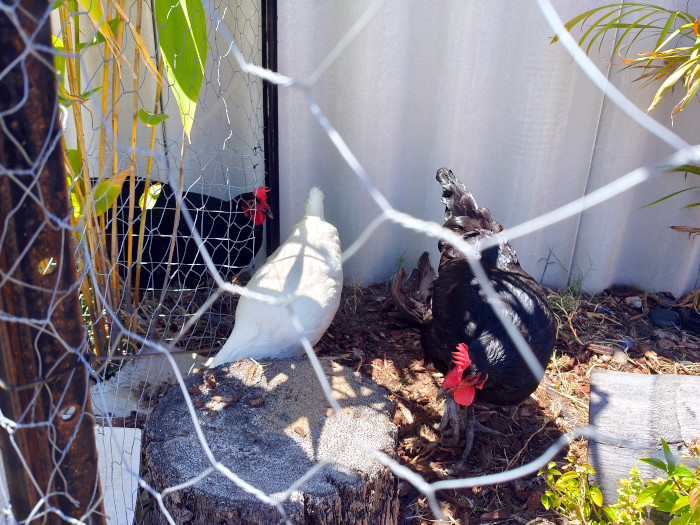
Building the Second Run
The idea for this area was to create a semi-wild space where plants could grow for the chickens to forage. The plan is to close off the tunnel for a few months at a time, allowing the plants to regrow before the chickens return and wreak havoc. However, for now, we don’t have a gate.
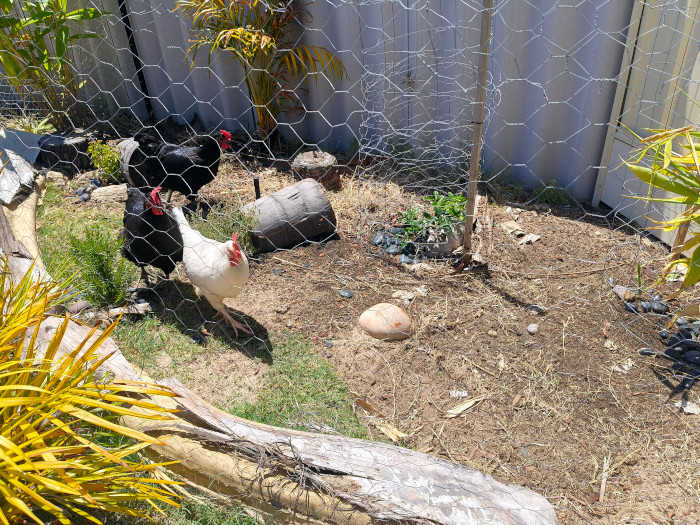
I started by putting some T-posts in the ground and making a fence with some leftover chicken wire.
I zip-tied the end of the tunnel to the wire fence, just like on the other side. This way, the chickens come straight out of the tunnel and into the forage area.
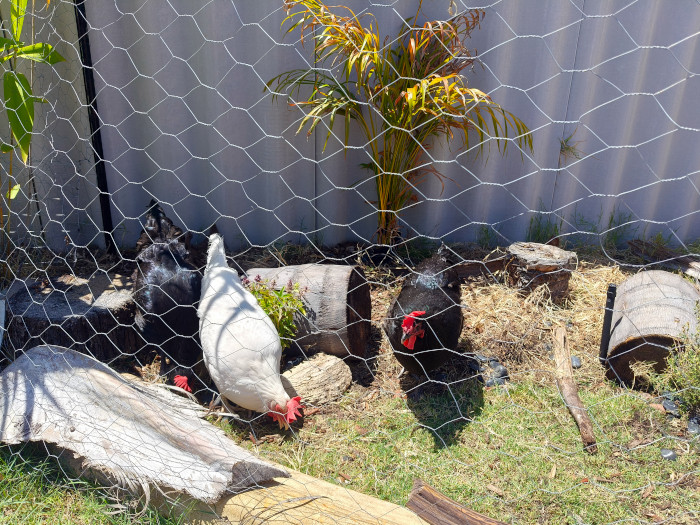
To fully enclose the space, I added chicken wire over the top and attached it to the boundary fence.

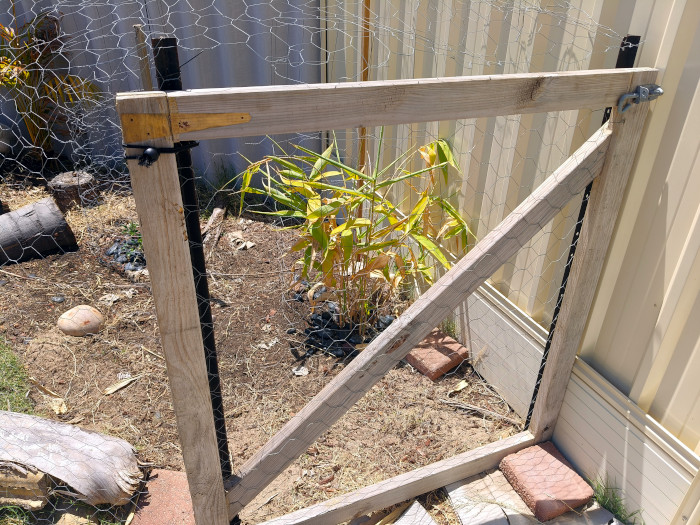
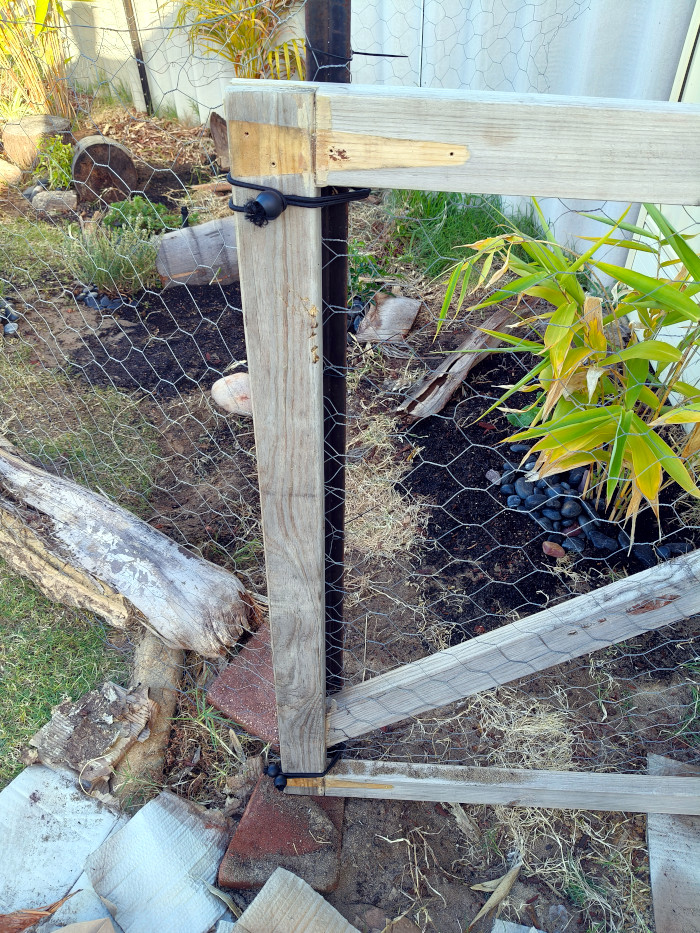
For access, I reused a gate I had built for an old chicken enclosure. Instead of reattaching hinges, I used two elastic straps as makeshift hinges, and it works pretty well. I do have to duck a little to get inside, but it’s no big deal.
Some of the plants inside are still small and vulnerable to the chickens, so I put cages around them until they grow larger.
To stop the chickens from scratching at the base of the plants, I also added small stones around them. This gives the plants a chance to establish themselves and eventually provide shade and forage for the chickens.
Tip: Future Lachlan here – small rocks don’t work well for this. Go for larger rocks or bricks instead.

Conclusion
Overall, this project turned out to be much easier and cheaper than I thought. It’s the kind of project where you can use your imagination and any materials you have at hand.
The key takeaway for anyone planning to build their own chicken tunnel? Invest in sturdy wire mesh. It should be flexible yet strong enough to stand on its own.
It’s not that expensive, and with a large, long piece, making a chicken tunnel is quick and hassle-free. Give it a shot—and your chickens will thank you for the extra space!