After raising chickens for a year, I decided to increase the size of my flock by raising baby chicks. If you’ve recently started your chicken-keeping journey, you might feel the same way I did—not entirely sure how to go about it.
Now that I’ve successfully raised my first brood of chicks, I want to share my experience and give some advice to help you get started. By the end, you’ll have all the information you need to raise your chicks successfully.
What You Need to Get Started with Baby Chicks
There are a few things you will need before you bring your chicks home:
Container
The container you choose will serve as your chicks’ brooder until they are old enough to move outside and into their coop.
You’ll want a container with high walls, as chicks can jump surprisingly well and grow very quickly. Ideally, the container should be clear or have viewing points to make it easy for you to see inside and to help the chicks get used to their environment.
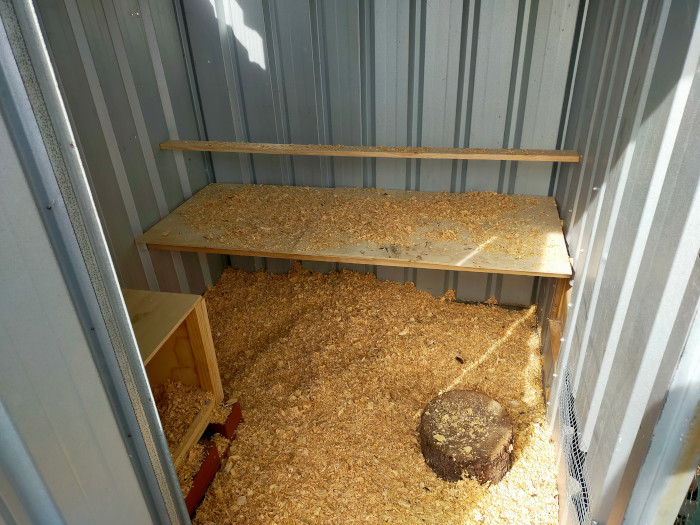
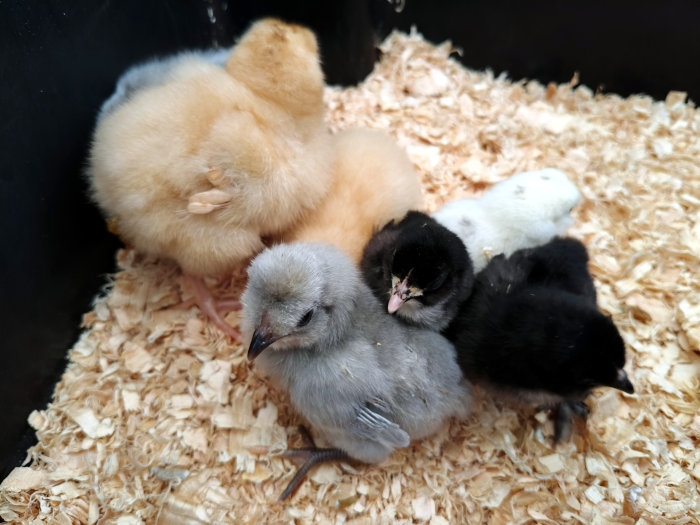
Since chicks poop a lot, the bottom of the container should be solid and easy to clean. I recommend putting cardboard on the bottom and layering it with something soft, like wood shavings, to absorb moisture and give the chicks something to scratch around in.
Unless the container is very tall, you’ll need a roof of some kind—this could be a grate, wire mesh, or a lid with holes to allow airflow. You want good ventilation for oxygen to get in and ammonia from their poop to get out.
Chicks grow quickly and will likely start flying around by the time they’re about 4 weeks old. Without a secure roof or barrier, there’s a good chance they’ll escape.
My first brooder was a plastic tub with chicken wire over the top. While it worked well initially, as the chicks grew, it became cramped quite quickly. Another issue was that the chicks often squished into the corners, particularly at night, which can lead to injury.
I’ve since upgraded to a pup tent, which I highly recommend as a container. It makes raising chicks so much easier. I chose a large one and while it’s a bit oversized, the smaller version felt too cramped. Sadly, there wasn’t a perfect in-between size for me.
It’s flexible and collapsible, making it easy to store away. The tent also has a zippered roof and door for easy access.

The chicks like the extra space and having room to run and fly around. This is good for their muscle and bone development and keeps them happy and healthy.
You want to avoid containers with sharp corners. Chicks tend to huddle together at night or when they’re frightened, which can sometimes lead to accidental injuries, especially if you’re raising chicks of different sizes. A rounded container reduces the risk of chicks getting squished.

Cleaning the Container
You’ll want to spot clean the brooder every day by removing any poop you can see. Once a week, I add fresh bedding. If you’re using the deep litter method, simply add new bedding on top of the old bedding. Otherwise, remove the old bedding and compost it if you’d like.
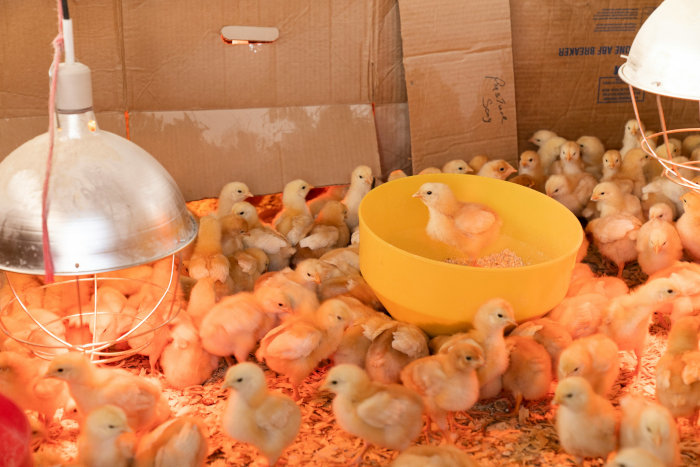
Heat Source
Baby chicks cannot regulate their own temperature, so they need a constant source of heat to stay warm. Without it, they can quickly become sick or die. There are several heat options to choose from:
Heat Lamp
A heat lamp can be hung or clipped to the side of the container. It’s a cheap and powerful heat source, but there are some downsides. Heat lamps can be a fire hazard, and they can disrupt the chicks’ day/night cycle. Chicks need to sleep at night, just like we do, and constant light can mess with this.
You can get orange or red light heat lamps which help reduce this but not totally.
Ceramic Heat Lamp
A ceramic heat lamp is a good solution because it generates heat without emitting light. This helps maintain a natural day/night cycle for the chicks while still keeping them warm. Since there is no light coming out, its a good idea to use a thermometer to ensure its working.
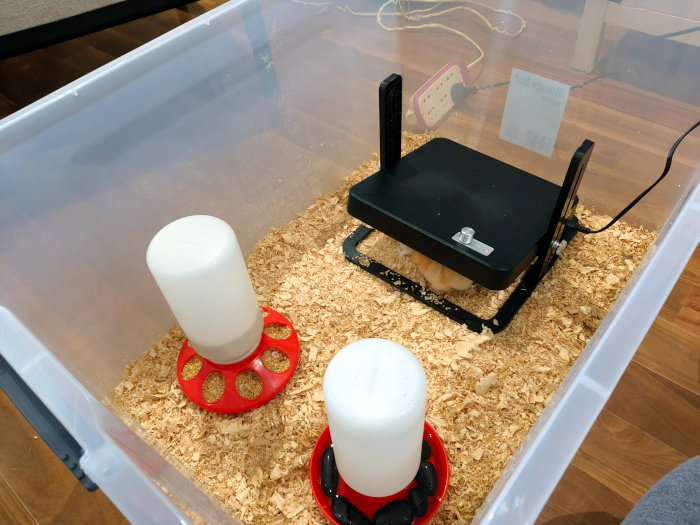
Heating Plates
Heating plates are a great option for keeping chicks warm. I personally used one and found it to be both affordable and effective. The plate should be set low enough for the chicks to touch it with their backs, mimicking the warmth a mother hen provides.
Many heating plates have adjustable settings, but it’s important to ensure the temperature is appropriate. Chicks only need around 36°C (96.8°F) during their first week, so avoid settings that make the plate too hot.
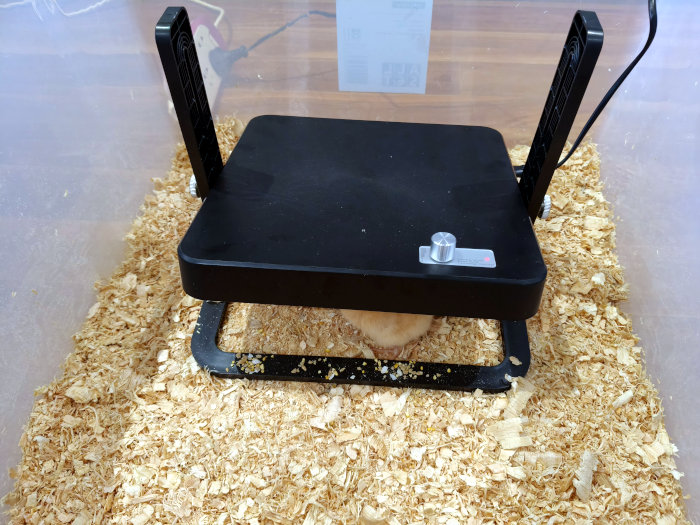
When I used a flat square heat plate, the chicks started roosting on it and pooping all over it as they got older. While this wasn’t a big issue for me, if you want to avoid this, you might consider a heat source with a dome on top to prevent roosting.
One thing to keep in mind is that heating plates take up more ground space than heat lamps, as they need to be placed inside the container.
Hot and Cold Zones
It’s important to create a hot and cold zone in the container so the chicks can choose the area they’re most comfortable in. Ideally, the food and water should be placed in the cooler zone, away from the heat source.

How to Tell If the Chicks Are Comfortable
You’ll know the chicks are comfortable with the heat when they lay face down—it might look like they’re dead, but they’re just relaxed and cosy.

If the chicks are crowding around the heat source, they’re too cold, and you should move the heat source closer. If they’re spaced out too far from it, they’re too hot, and you should move the heat source farther away.
Adjust the height and temperature settings of your brooder setup to find what works best for you.
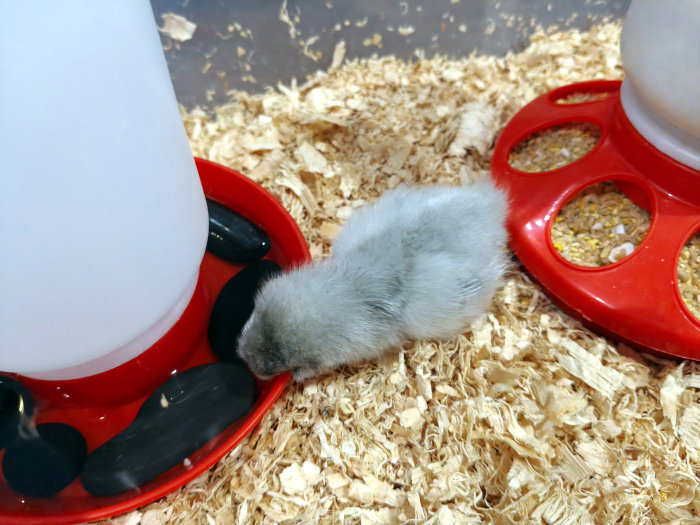
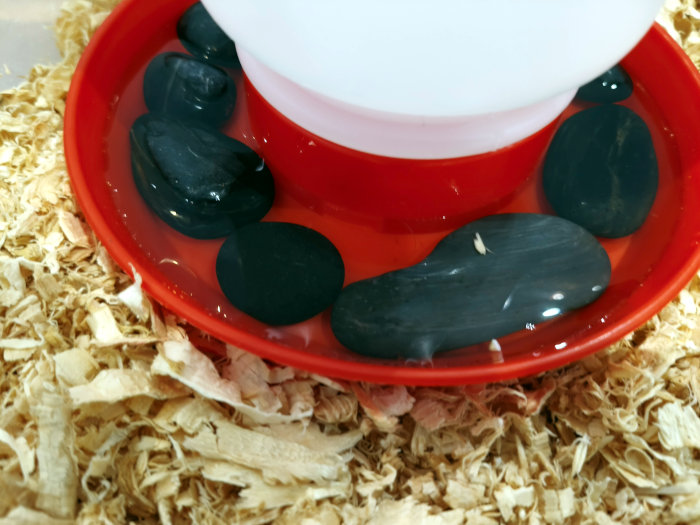
Water
Like with most living things, it’s important to provide your chicks with fresh, clean water at all times. When you first introduce them to their new home, dip their beaks in the water so they know where to find it.
I started with a general waterer, but I found they tend to poop in it a lot. Keeping it clean can become a hassle since they’ll kick things into it or poop directly in it. You can elevate it slightly to reduce this. Alternatively, a nipple waterer could be a lower-maintenance option.
Personally, I prefer the traditional waterers because I like how the chicks drink from them naturally.
For the first few weeks, when the chicks are really tiny, place small stones in the water to prevent drowning. Chicks can be pretty careless and creative when it comes to getting into trouble, so it’s best to take precautions to avoid accidents.
Feed
Just like with water, chicks tend to make a mess by pooping in their food, so it’s a good idea to keep the feeder slightly out of the way. I used a regular feeder, and it worked fine for me. You’ll need to provide specialized chick feed, which you can find at most pet supply or farm stores.
Look for feed labelled “chick starter” or something similar, as it’s specifically made for young chicks. It’s crucial to ensure they have access to food 24/7 during their early growth stages, as they need consistent nourishment.
Chicks typically eat the most when they first wake up and just before bedtime. During the day, they will scratch around, forage, and occasionally nibble on their feed.
Once they reach around 8 weeks old, you can start transitioning them to grower feed, which has a different nutrient composition compared to starter feed. Remember, pullets (young hens) and adult chickens require different types of feed as their nutritional needs change.

Grit
Chickens don’t have teeth, so they swallow sand or small stones to help crush and digest their food. Chick feed is specially formulated, so chicks don’t need grit as long as you’re only giving them their special chick feed.
However, if you give them treats or snacks like crushed-up mealworms, it’s a good idea to provide them with a source of grit to help with digestion. Without it, your chicks could have digestive issues, which could lead to serious problems.

Bringing Them Home
Before bringing your chicks home, make sure their brooder is already set up and ready to go. The chicks will be fine for about 30 minutes to an hour in their box during the ride. Just avoid running the air conditioner or leaving them in a hot car—room temperature is perfect for them.
Keep the box closed and dark on the way home to help keep them calm. Make sure it’s secure as bouncing around will stress them out even more. You should expect a bit of mess when you open the box—chicks tend to poop a lot when they are stressed. You’ll want some ventilation, so ensure there are a few cracks or holes for airflow.
Once you’re home, place them directly into the brooder and let them settle in. They’ll likely adjust quickly and start getting comfortable.
Chick Behaviours
Taking care of chicks for the first time can be a little intimidating, especially if it’s your first time raising them. Here’s what some of their behaviours mean:
Pecking Order
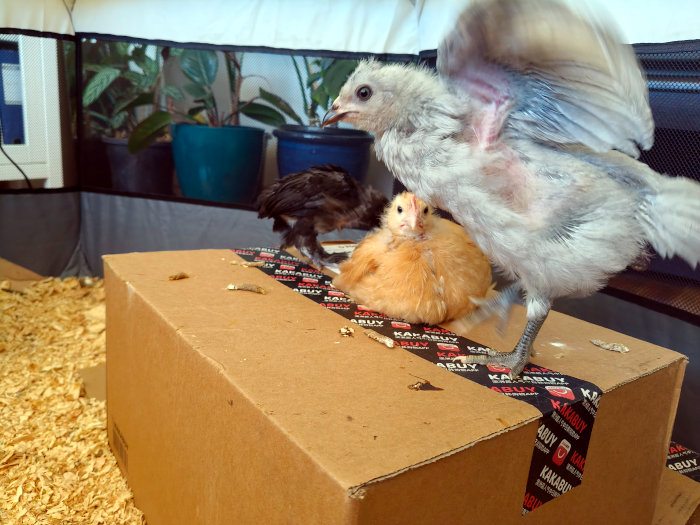
Chicks will start establishing a pecking order from about one week old, so expect to see some posturing and a little fighting. This behaviour tends to intensify as they grow, particularly if you have baby roosters. It’s important to let this process play out, as it’s natural and will ultimately help create a peaceful flock.
Intervene only if bullying becomes excessive, with signs of injury such as blood being drawn. Bullying can also be a sign of overcrowding, so make sure there is plenty of space for all the chicks.
If needed, you can separate a bully into a separate container for a few days to help reset the dynamics. You can also discourage aggressive behaviour by gently imitating a peck on the back, as a more dominant flock mate would.
Bonding with Your Chicks
Chickens will sleep together, talk together, eat together, and pretty much do everything together. This reinforces a sense of unity with their brood mates, and separating them can be very stressful for them.
That’s why it’s a good idea to establish a bond with your chicks so they won’t be afraid of you and will come to you willingly. A good bond is helpful for things like inspecting them, grooming, caring for sick chicks, and other interactions. Plus, if you just want to keep chickens as pets, a strong bond is pretty nice.
Things I’ve found effective for bonding include spending a lot of time with your chicks. Move slowly and avoid towering over them, as this can scare them. Chickens are very good at remembering faces, so putting your face close to theirs and looking them in the eyes can help make you familiar to them. You may notice they’ll do the same, which strengthens the bond.

If you want them to come to your hand willingly, you can start feeding them crushed treats like mealworms. Keep in mind it’s a good idea to provide them with grit if you offer treats. Over time, they’ll learn to come to your hand when you offer it.

If you want to hold chicks, the best way is to gently hold their wings down or let their feet hang in the air. Chicks can push and jump quite well, and a fall can be dangerous, so always hold them securely but not too tightly.
When they are a few weeks old, they may jump on you and roost on your arms, shoulders, head—anywhere they can get to. This is a good sign that they are comfortable with you and trust you.

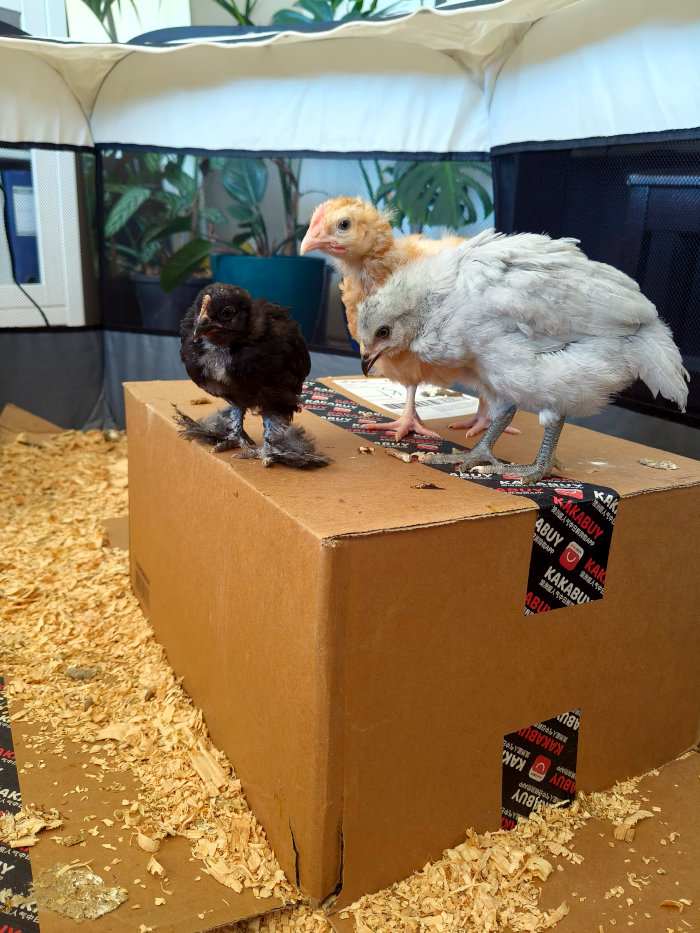
Roosting
Chickens naturally prefer to fly to the highest spot they can find to hang out or sleep at night. While chicks tend to stay on the ground when they’re young, as they get older, it’s important to provide them with a spot to jump up to and roost. This helps mimic their natural behaviour and ensures they feel comfortable and secure at night.
While the chicks are still in the brooder, they will likely roost on the ground, but it’s helpful to give them a raised area to train them for their future outside. This early training helps them adjust to roosting in higher spots once they’re moved to a proper coop.
Why Are My Chicks Chirping So Loud?
When chicks are stressed, they make loud distress calls—constant, high-pitched chirping. As a general rule, loud chirping means your chicks are unhappy about something, while quiet, soft chirping or silence means they are content and comfortable.
Here are some common reasons chicks might chirp loudly:
- They’re cold or too hot. Check the temperature of their brooder and adjust as needed.
- They’re hungry or thirsty. Ensure they have easy access to food and water.
- They feel unsafe or lonely. This can happen if they’re in a new environment or separated from the group.
You may also notice loud chirping when chicks get excited, like when they discover food or something interesting. Over time, you’ll learn to tell the difference between their distress calls and happy excitement.
As night approaches, it’s normal for chicks to chirp loudly while they settle in for sleep. This is usually worse during their first few nights in a new home. They might push and jostle each other to find the best spot. Make sure they can easily find their heat source and give them time to settle down.
Common Chick Problems
While everything usually goes smoothly, you might run into a few problems:
Pasty Butt
Young chicks usually a week or two old can sometimes get a condition called pasty butt. This happens when the chicks’ poop gets stuck to their vent and can’t come out. If left untreated, they won’t be able to poop and will eventually die, so it’s important to check for this every day.

To treat pasty butt, wet a cloth or paper towel with warm water and gently dab at the area until the poop comes off. It’s okay if some poop remains around the butt, as long as the vent is clear.
If you don’t catch it early, the build-up can harden and become more difficult to remove. In this case, soaking the chick in warm water (just enough to cover their bottom) for about 15 minutes can help soften the poop and make it easier to clean.
Pasty butt is most common during the first week or two of a chick’s life. After that, their vents grow larger, and it usually becomes less of an issue.
Coccidiosis
Coccidiosis is a parasitic disease caused by protozoa that are always present in chickens but can sometimes multiply uncontrollably, leading to illness or even death. It spreads through contaminated food and water, making it essential to keep the brooder as clean as possible and to minimize the amount of poop in their food and water.
Chicks from hatcheries or farm stores are often vaccinated at birth to build immunity against coccidiosis. When purchasing chicks, you may be offered a medication such as a coccidiostat. This can be added to their water to help prevent infection, especially during the vulnerable first few days.
Signs of Coccidiosis
- Lethargy
- Weakness
- Difficulty standing or falling over
Treatment for Coccidiosis
It’s usually treated by adding a coccidiostat or other medication to their water. During this time, it’s a good idea to isolate the sick chick to prevent the disease from spreading.
If caught and treated early, the chances of recovery are much higher. However, coccidiosis can sometimes be fatal, especially in very young chicks.
Splayed Legs in Chicks
Splayed legs, also known as spraddle legs, is where a chick’s legs are spread out to the sides, making it hard for them to stand or walk. This can happen due to slippery surfaces in the brooder, nutritional deficiencies, or being cramped in the egg during hatching.
Signs of Splayed Legs
- The chick’s legs stick out to the sides instead of being underneath its body.
- Difficulty standing or walking.
- Scooting or flopping around instead of moving normally.
Treatment for Splayed Legs
Treatment for splayed legs typically involves gently correcting the position of the chick’s legs using a leg brace. This can be made from soft materials like medical tape or a small bandage to hold the legs in the right position, allowing the chick to regain strength and proper alignment over time.
You can get premade chick leg braces for this problem online from amazon and other places.
During treatment, it’s important to make sure the chick has a non-slip surface to stand on, such as wood shavings or a rubber mat.
If addressed early, splayed legs are often easy to correct, and the chick can recover fully. However, if left untreated, the condition can become permanent, making it difficult for the chick to walk.
Taking Your Chicks Outside
Like plants, chicks benefit from a bit of hardening off if your taking them outside after being raised indoors. When they’re around 4 weeks old, you can let them explore outside for about 10 minutes at a time. This helps them adjust to the outdoors, including exposure to wind and slightly harsher conditions.

However, you’ll need to stay with them during this time, as they are still highly vulnerable to predators and the elements. Ideally, release them in a controlled area with some shade, and choose a day with mild temperatures for their first outdoor adventures.
Best Time to Raise Chicks
The best time to raise chicks is probably spring. The inside of your home will likely have a moderate temperature—not too hot or too cold—which is ideal for their early weeks. Additionally, when it’s time to move them outside, the weather will typically be more suitable.
That said, we raised ours during the peak of summer, and it worked out just fine. So, while spring is optimal, you can really start raising chicks at any time of the year if you’re prepared to manage their environment appropriately.

What to Expect as Your Chicks Grow
Baby Chick (0–2 weeks): Chicks are most vulnerable during this time, with a higher risk of health issues like pasty butt. Make sure to monitor them closely and keep their brooder extra clean during this time.

Feathered (3–4 weeks): Chicks feathers starting coming in and they become more adventurous and curious. Around this time, they also begin to explore roosting. Providing a small box or low perch can encourage them to start practicing this natural behaviour.
Gender Clues (4–6 weeks): Larger combs or wattles, stronger redness, and larger size are indicators that chicks may be male, though this isn’t guaranteed. This is also a good time to take the chicks outside to explore their surroundings.

Fully Feathered (6–8 weeks): By now, chicks will no longer need a heat source and will be ready to move outside for integration into an existing flock or settle into their new coop.

Conclusion
Raising chicks for the first time can feel overwhelming, but with the right setup, attention, and a little bit of patience, it’s a pretty cool experience. Every chick has its own personality, and building that bond with them early on will only make your chicken-keeping journey more enjoyable.
Whether it’s your first batch or you’re adding new members to an established flock, remember that the key to success is consistent care and observation. It’s definitely more work than raising pullets but I enjoyed it and I’m sure you will too.